Screenshot Tests Are Manual Tests
When I joined Dropbox almost 2 years ago, I was asked to help improve the screenshot testing experience, resulting in Dropshots. While I’d played around with early versions of Paparazzi by that point, many of our tests were too heavily reliant on full Activities and Fragments to make use of host side JUnit tests.
The more I’ve worked with screenshot tests, the more I’ve come to understand their promises and limitations.
What screenshot tests offer⌗
Screenshot testing can be really helpful to validate that elements on the screen are rendered as you expect. They can help you detect visual changes that might have otherwise gone unnoticed.
For instance, if you’re working on design system components, screenshot tests can help you validate the appearance of your components, and highlight when the rendered appearance of your components changes. When this happens you can review a visual diff of the changes to ensure that they change as you expect them to.
That last sentence, I believe, often gets missed when using screenshot tests for apps.
The temptation of screenshot tests⌗
Screenshot tests have an interesting alure: we write our screens in code, so we want to test them, but testing UIs is challenging.
Other UI testing tools like Espresso and Compose Sematics can seem confusing and hard to manage.
Enter screenshot testing tools like Paparazzi, which offers UI testing directly in JUnit tests, without the use of a device. This can seem immensely valuable in our efforts to ensure code coverage for our UI code, but it comes with some hidden costs.
Screenshot tests validate appearance⌗
When you write a screenshot test you’re not validating the behavior of your program, you’re validating the appearance of your program. While these are sometimes corelated, they’re not the same thing.
Since screenshot tests can easily cover large sections of UI code, they can make it easy to increase code coverage numbers, but it’s important to keep in mind what they’re really testing.
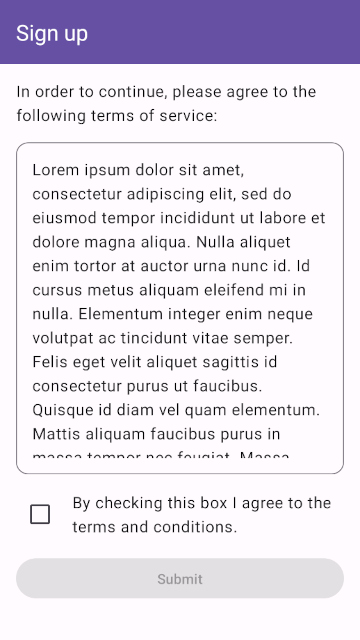
For example, if I’m testing a terms of service screen, I can pretty easily add lots of test coverage by adding a single screenshot test to validate the screen.
That’s great! My well tested app is now safe from regressions!
Screenshot tests require manual validation⌗
Fast forward a couple of months and imagine that your UX designers don’t like that the terms of service requires two taps. They want to update the copy to suggest that signing up automatically accepts the terms of service. So you dutifully remove that pesky checkbox, and your screenshot tests successfully catch that the appearance has changed and shows you this diff.
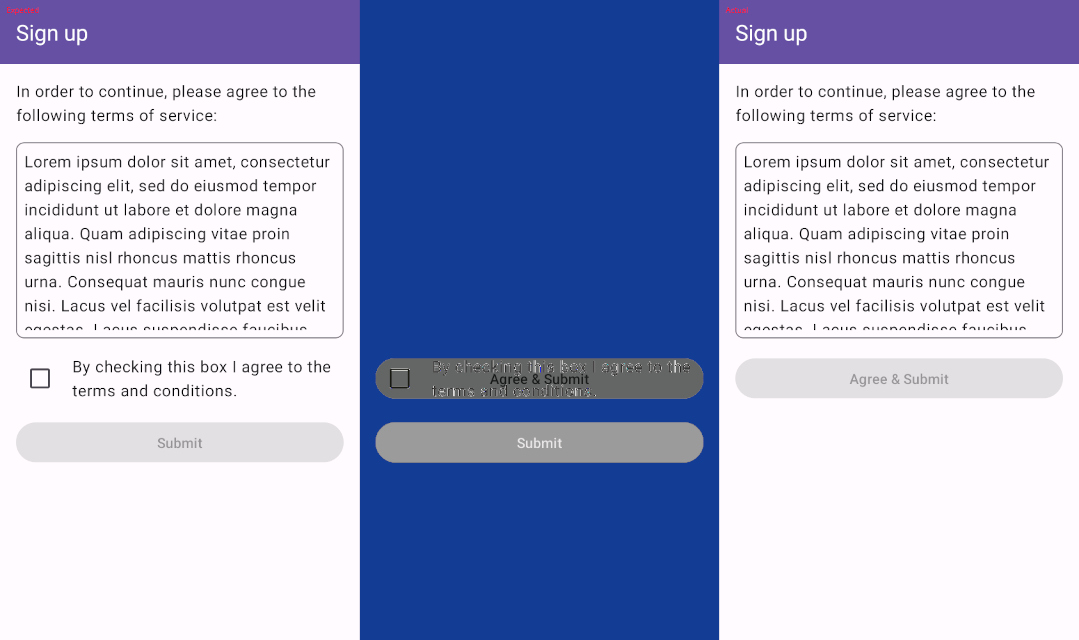
Noting that the only change on the screen is the removal of the checkbox, as expected, you simply record new screenshots and go along with your day.
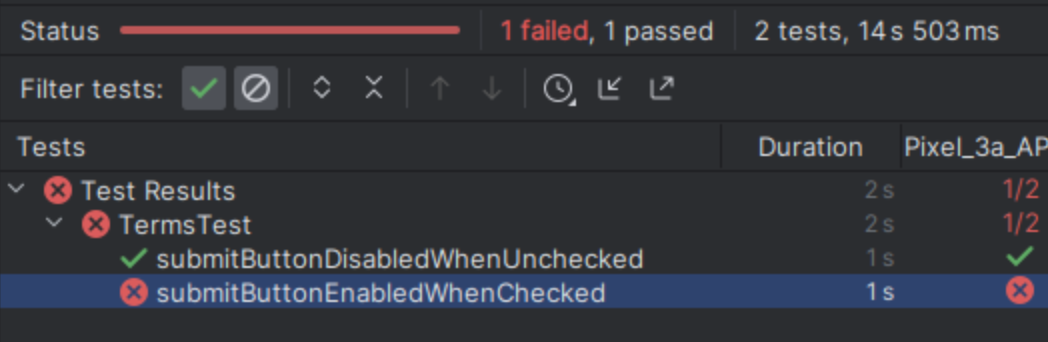
It won’t take long after this change hits production to see your sign up numbers plummet since, without the ability to check a box to enable the submit button, users have no way to actually continue from this screen.
These screenshot tests failed. While they appropriately reported that the appearance of the screen changed, the appearance of the screen was expected to change, so that in and of itself wasn’t a significant red flag. The tests provided information that the author and reviewer both had to then interpret to ensure that the behavior was working as expected. That describes manual testing.
Use the right kind of tests⌗
While screenshot tests are certainly valuable, we should be careful to make sure that we understand the cost of relying on them. They offer us a great way to guard against visual regressions and ensure that our UI components appear as we expect them to, but they aren’t a direct replacement for more traditional test assertions.
The example above might have alternatively been tested using scemantic tests using the ComposeTestRule, as detailed in the guide on testing your compose layout, either as instrumentation tests or Robolectric tests.
While these tests could also have been ignored or misunderstood, they generally provide a more nuanced understanding of the desired behavior, since they don’t rely on visually interpreting the desired result. As a bonus, they’re also less brittle, since they don’t need to be updated when fonts, colors or other unrelated things change.
Conclusion⌗
Ultimately, it’s important to understand the different testing tools available, and use the right tool for the job. Screenshot tests are great for knowing when things change visually, but come with the burden of manually validating those changes. For testing the behavior of your code there are better, more robust options available.