Getting Started with Git
This is the second post in my Start to Finish series. You can check out my first post introducing the series and my tools here.
What is SCM?⌗
SCM, or source code management, is a system that helps developers manage the source code for their projects. They have been around forever, things like CVS, Subversion (SVN) and now Git are the popular ones.
SCMs allow you to version your source code, which is why they are also called Version Control Systems. Versioning your code helps you easily keep track of changes that have been made so that you can go back to previous versions in case anything happens.
As an example, let’s say you release an app. We’ll call that version 1. Now you start developing version 2 of your app with all sorts of new features. After a little while, users of version 1 report a bug. How do you fix it? You are already deep into version 2.
With version control, you can easily go back to version 1 and fix that bug, then release version 1.1. You can also merge that fix into the current development version (version 2) so that it’s also fixed in all future releases.
This is a very simple example of why version control systems are important, even on a team of one.
Setting Up Git⌗
The first step is to install Git. This can be done in several ways and depends on your system. You can find out how to install Git for your system at the Git website.
I use a Mac, and like to use Homebrew to install command line programs. You can do that with the following command:
$ brew install git
One Time Setup⌗
After installing Git, you need to do a few one time tasks. These are system settings, so you only have to do them once per machine.
First you need to set your name and email so git knows who you are. This can seem rather unnecessary when you’re working on a project alone, but in teams this is very helpful.
$ git config --global user.name "Your Name"
$ git config --global user.email your.email@example.com
Creating a Repository⌗
Each project you work on will be stored in a repository. A repository is simply a folder that contains version controlled material. In our case, that will be the app we are going to develop.
For now, create a new directory called my_app.
$ mkdir my_app
This directory is going to be where we store all of the files that make up our project. Since we want this to be a repository, we need to go into that directory and initialize a new repository.
$ cd my_app
$ git init
Initialized empty Git repository in /Users/rharter/code/my_app/.git/
As you can see, we now have a new, empty repository in the my_app directory.
Adding a .gitignore File⌗
The next step is to add files to the repository. By default, Git tracks every file in a repository, which is almost never desireable. There are many files, such as log files, build artifacts, local config files (local.properties), and the dreaded (at least on Mac) .DS_Store file, that either isn’t important to track, or shouldn’t be shared amongst your team.
Telling Git to ignore these files is as easy as adding a .gitignore file to the root of our repository. This file simply lists the files and directories that should be ignored by Git. For this example, it’s quite simple, but we will fill it in a little more once we make an Android project.
# .gitignore
# Lines preceded by a hash symbol will be ignored.
.DS_Store
Working With a Repository⌗
While you are working on your project, you need to make sure Git knows about all of the files you create as you go. Lets start out by making some files.
$ touch README
In the command above we created an empty README file. This is the standard file to share instructions or other introductory material for your project.
Now you can check the status of your Git repository and you will see your new file.
$ git status
# On branch master
#
# Initial commit
#
# Untracked files:
#   (use "git add <file>..." to include in what will be committed)
#
#	README
nothing added to commit but untracked files present (use "git add" to track)
As you can see, we now have our README file listed as an untracked file. This means that Git is not tracking changes to this file.
Git is quite nice in that it also tells us exactly how we might want to fix this issue. You can see that it mentions the git add command to include our new file. Let’s do that now.
$ git add README
$ git status
# On branch master
#
# Initial commit
#
# Changes to be committed:
#   (use "git rm --cached <file>..." to unstage)
#
#	new file:   README
#
Now you can see that our new README file is listed as a new file to be committed. The last piece to this puzzle is to commit this change, saving the current state of our README file in our repository.
$ git commit -m "Adds readme file"
[master (root-commit) 0b3ab64] Adds readme file
 0 files changed
 create mode 100644 README
And that’s it, we now have a README file in version control. This add/commit cycle will continue throughout our development cycle to make sure all new changes are stored in a version.
A Note About Commit Messages⌗
Commit Messages (the part after the -m) are meant to be helpful notes about what a specific commit does so that when you are perusing through your commits later to get back to a known point you know what happened without having to dive through the code.
Some argue that these messages are really descriptions of patches, which they techinally are. Under that assumption, the message should be about what the patch does, not about what you did. That’s why the message you see above says Adds instead of Added. This can seem like a trivial note, but is quite different than the norm if you come from other version control systems and can be quite difficult to get used to.
It really doesn’t matter how you discribe your commits, as long as you (and your team) know what the messages mean.
How Does That Help?⌗
It’s probably not entirely clear at this point why Git is important, so let me give you a little example.
Let’s say that you’re working on your project and you accidentally delete an important file. In our case, we only have a README file, so we’ll delete that one.
$ ls
README
$ rm README
$ ls
$
You can see that we have removed the README file and the rm command has no trash bin, so what do we do?
Let’s first check the status of our repository to see if it can help.
$ git status
# On branch master
# Changes not staged for commit:
#   (use "git add/rm <file>..." to update what will be committed)
#   (use "git checkout -- <file>..." to discard changes in working directory)
#
#	deleted:    README
#
no changes added to commit (use "git add" and/or "git commit -a")
As you can see, since we had our README in source control Git knows that we deleted the file since the last commit. It doesn’t know that it was a mistake, but knows that it was a change.
Since Git is so helpful it has also told us what to do in either case, whether we meant to delete the file or not. Since we didn’t, let’s take Git’s advice and use the git checkout command to discard the change (delete) and revert our README to the last commit.
$ git checkout -- README
$ ls
README
As you can see, I was able to recover my README file using git checkout -- README and haven’t lost any time.
This may seem like a contrived example, but this type of thing has happened to me more than a few times and I’m always glad I have Git by my side.
Github⌗
Now that you are familiar with Git, let’s talk about Github. Github is a social coding site that serves as a sharing point for your Git repositories. I recommend adding your repository to Github for two reasons: it offers a full backup of your code (include the history of commits) and makes future collaboration very easy.
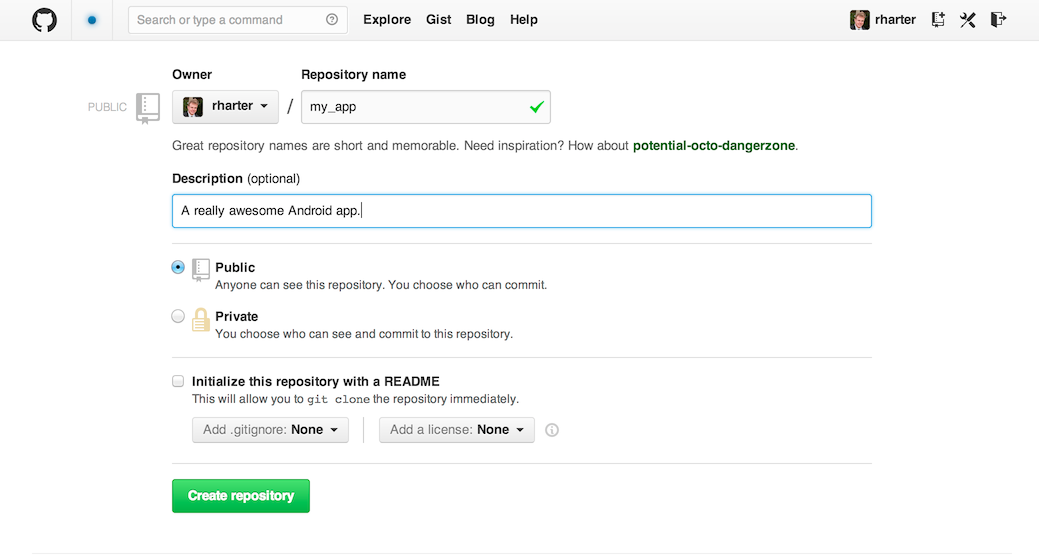
Using Github is easy and free (for public repositories), just create an account and make yourself a new public repository. Github will give you instructions on how to add your existing repository and push up your existing code.
Homework⌗
Now that you have a good idea of how to use Git, I’d recommend checking out Github’s Git training. It’s a great way to learn the basics of git right from your web browser.
Next time we’ll get into starting our Android project with Android Studio and seeing our code for the first time.
As always, if you have any questions drop a line in the comments, or email me at ryan@ryanharter.com and I’ll do my best to help out. And don’t forget to sign up below to receive updates when new posts are available.